
What Should I Know About Choosing the Right Backsplash Height?
The backsplash is one of those kitchen details that does two jobs simultaneously: it protects the wall from splashes, grease, and cooking residue, and it contributes significantly to how the whole kitchen looks. The height you choose directly affects both of these functions. A backsplash that is too short misses sections of wall that genuinely need protection. One that is too tall can feel heavy or compete with other design elements. And one that hits exactly the right height becomes part of what makes the kitchen feel considered and finished.
There is no single correct answer, because backsplash height depends on ceiling height, cabinet configuration, the material being used, the overall design direction of the kitchen, and where the backsplash is being installed. What there are are clear principles that make these decisions easier and a set of common mistakes that are worth knowing in advance.
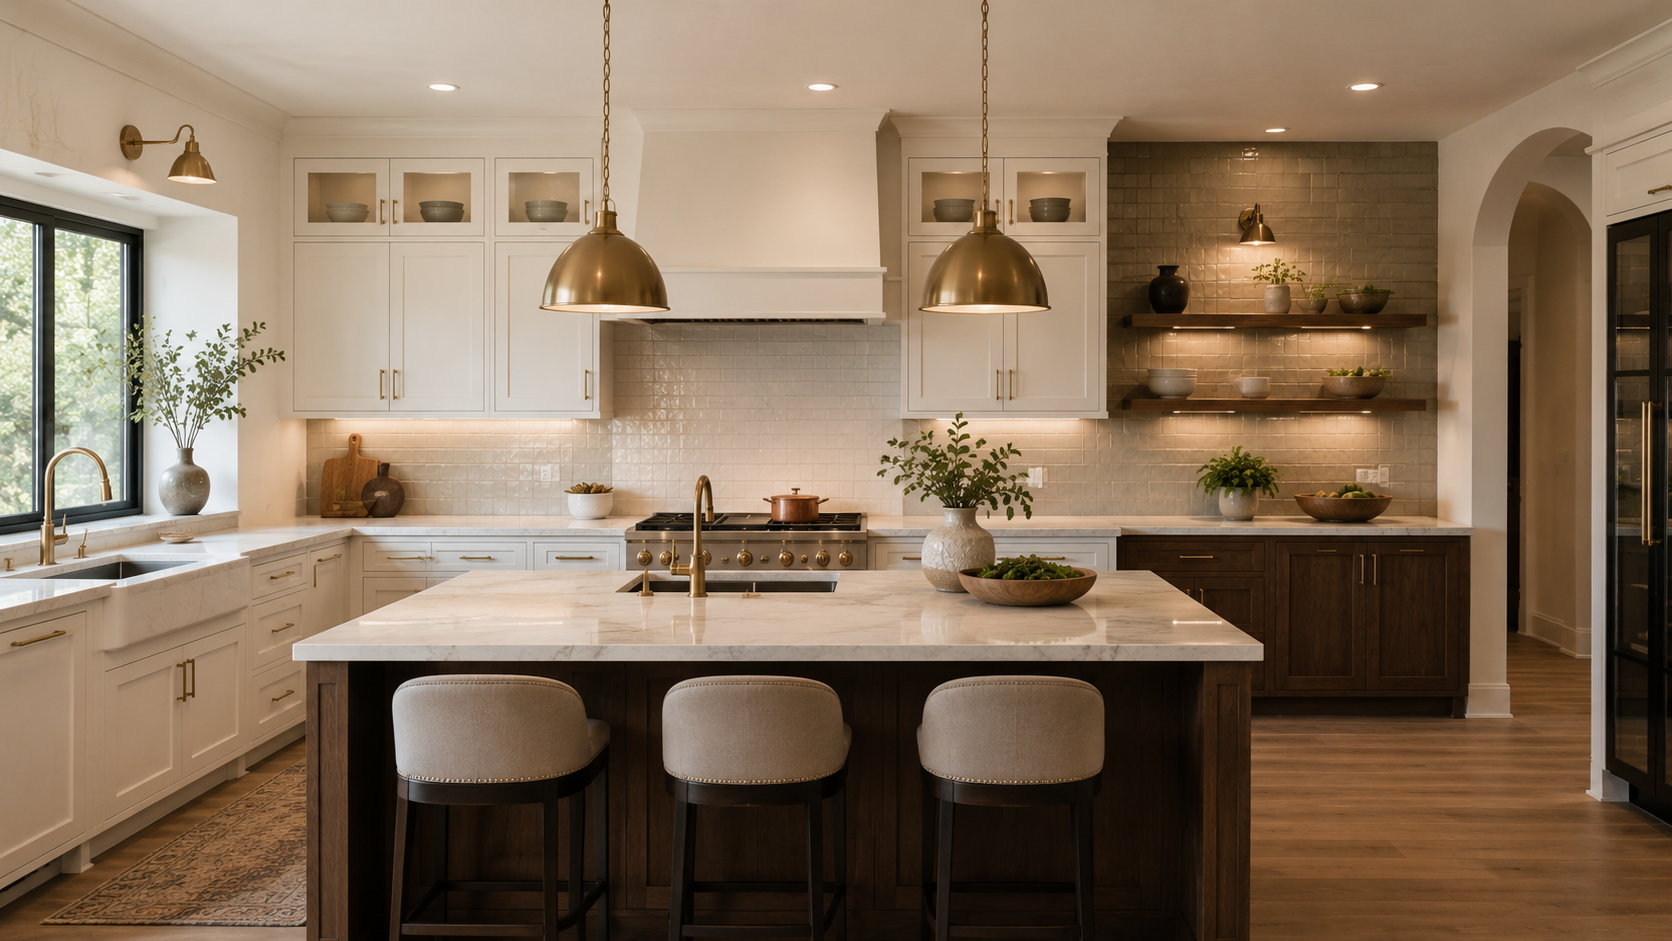
Quick Answer: The standard backsplash height is 18 inches, running from the countertop to the bottom of the upper cabinets. This covers the critical protection zone behind a standard sink or preparation area. Full-height backsplashes that run all the way from countertop to ceiling, or from counter to the top of the upper cabinets, are increasingly popular and provide a more dramatic visual impact. The right choice depends on ceiling height, the material selected, and the design statement you want the kitchen to make.
The Standard 18-Inch Backsplash
In most kitchens, the upper cabinets sit approximately 18 inches above the countertop surface. A backsplash that fills this gap is the most functional version: it covers the wall most exposed to splashing and steam, ties the counter and cabinets together visually, and is the most straightforward to tile and maintain.
This height works in almost every kitchen configuration and is the default in most cabinet packages. It is easy to grout and clean, requires a modest quantity of tile or material, and allows the wall above the upper cabinets and the wall below the countertop (in an unfitted base section) to be a different material or painted finish, which keeps the backsplash as a clean mid-zone rather than a dominant feature.
The relationship between the backsplash and countertop and backsplash materials should be considered together from the design stage, since contrasting or complementary materials at these two points set the tone for the whole kitchen palette.
Full-Height Backsplashes to the Ceiling
Running the backsplash all the way from the countertop to the ceiling creates a dramatic, cohesive look that is particularly effective in kitchens with high ceilings or where the design aims for a bold, architectural feel. This approach works best in rooms with 9-foot or higher ceilings, where the wall run has enough height for the material to make a genuine visual statement without feeling oppressive.
It also works very well with large-format tiles or slabs of stone or quartz, where the absence of horizontal grout lines across the full height creates an effect closer to a furniture panel than a conventional tiled wall. These large-format applications require very flat and well-prepared walls and typically benefit from professional installation.
Kitchens without upper cabinets on some walls are natural candidates for floor-to-ceiling backsplash treatment, as there is no cabinet base to interrupt the material and the full wall surface becomes a single visual plane.
Backsplash to the Top of Upper Cabinets
A popular middle option is to run the backsplash from the countertop to the top of the upper cabinet run rather than to the ceiling. This creates a uniform height across the kitchen without the backsplash disappearing behind the upper cabinets and leaving only the standard 18-inch section visible. Cabinet height is an important consideration here: taller upper cabinets that run to or near the ceiling make this approach very similar to a full ceiling treatment, while standard-height cabinets with a visible soffit above them create a mid-height option that is taller than standard but not fully ceiling-height.
Behind the Hob or Cooker
The wall behind the hob or cooker receives more heat, grease, and concentrated splashing than any other section of backsplash. This section specifically benefits from running higher than the standard 18 inches, and it is common practice to extend the tile behind the cooker to the underside of an extractor hood or all the way to the ceiling on that wall, even if the rest of the kitchen uses a standard height.
The cooker wall is also a natural focal point in the kitchen, and treating it with a different material, pattern, or colour from the rest of the backsplash is a common design technique for adding visual interest. A hand-painted tile, a contrasting stone, or a bold pattern on the cooker wall with a simpler material elsewhere creates a considered composition rather than a uniform surface.
The range of backsplash material choices available includes ceramic, porcelain, natural stone, glass, and engineered quartz, each with different heat resistance, maintenance requirements, and visual properties that influence how well they work behind a cooker specifically.
Colour and Pattern in Relation to Height
The visual weight of a backsplash changes significantly with height. A standard 18-inch section in a strong colour or bold pattern has a contained, decorative effect. The same material running to the ceiling on all walls would feel much more intense and potentially overwhelming, particularly in a smaller kitchen. Colour choices throughout the kitchen should account for how much of each element will be visible, with bolder materials working best in contained sections rather than across the full wall height.
The way the backsplash countertop colour and the wall surface above the upper cabinets read together is part of this visual calculation: a light countertop, a mid-tone backsplash, and a pale painted soffit above the cabinets creates a layered transition that feels natural, while a dark countertop, a dark backsplash, and dark upper cabinets can feel heavy if not offset with light elsewhere in the room.
When mixing materials in the kitchen across countertops, cabinets, and backsplash, a useful discipline is to vary the material while keeping a consistent tone: a warm white marble countertop, a warm cream subway tile backsplash, and warm wood-tone cabinetry create material variety without tonal conflict.
Common Height Mistakes
The most common backsplash height mistake is stopping short of the underside of the upper cabinet. A gap of even a couple of inches between the top of the tile and the bottom of the cabinet looks unfinished and creates a ledge that collects grease and is difficult to clean. The tile should meet the cabinet base cleanly.
The second most common mistake is not accounting for the full height of the tile above the hob behind an extractor hood that extends over the cooker wall. The area between the top of the hob and the underside of the hood needs full coverage, and this section is frequently underestimated when calculating tile quantities or deciding on design continuity.
A third error is choosing a grout colour that competes with or interrupts an otherwise clean tile. Large-format tiles with very fine grout joints in a matched colour read as a surface. Smaller tiles with prominent contrasting grout create a grid pattern, which is a legitimate design choice but should be intentional rather than accidental.
Frequently Asked Questions
What is the standard backsplash height in a kitchen?
The standard backsplash height is 18 inches, which typically fills the gap between the countertop and the underside of upper cabinets. This provides adequate protection for the most exposed wall area and is the most common configuration in both stock and custom kitchens.
Should the backsplash match the countertop?
It does not need to match, but it should complement. A coordinating tone or material that shares an element with the countertop creates visual flow. A strongly contrasting backsplash can work well as a deliberate design statement but requires care to avoid the kitchen feeling visually fragmented.
Is a full-height backsplash worth the extra cost?
In most cases yes, particularly for kitchens with high ceilings or an open-plan setting where the kitchen wall is visible from multiple rooms. A full-height backsplash reads as premium and considered, and large-format stone or tile at this scale creates an impact that standard 18-inch tile cannot.
Can I have different backsplash heights in different areas of the kitchen?
Yes, and this is quite common. Running the backsplash higher behind the cooker than behind the sink or prep areas is both functional and visually logical. It draws attention to the cooking zone as a focal point while keeping the rest of the backsplash at a proportionate, less dominant height.
What grout joint size works best for kitchen backsplash tile?
For a seamless, contemporary look, minimal grout joints of 1 to 2 millimetres in a colour matched to the tile are most effective. Wider joints in a contrasting colour emphasise the tile grid, which suits traditional and artisanal tile styles but can feel busy with large-format modern tiles. The grout colour should be chosen alongside the tile rather than as an afterthought.
The Bottom Line
Backsplash height is a decision that affects both the function of the kitchen wall and its visual character. Getting it right requires knowing the material, the ceiling height, the cabinet layout, and the overall design tone before committing to either a standard run or a full-height statement.
Kitchen Discounters helps homeowners make these integrated decisions so the backsplash, cabinetry, and countertops all work together rather than each being chosen in isolation. If you are planning a kitchen remodel or updating a specific area, reach out to start a conversation.